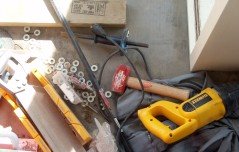
Until recently I would just grab the tools I needed and bring them to the part of the house needing the work, then shove them back into a storage closet after I was done. This worked for a while and was certainly highly portable! But after wreaking my knee caps kneeling on a concrete basement floor while using a saw, I decided I better set up a slightly more permanent work area. This was also needed because I had some bigger, longer term projects on the horizon that had to be kept out of the way.

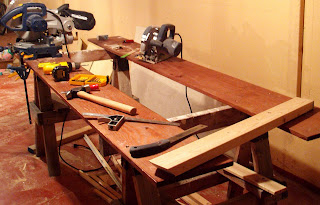
So I brought in some old saw horses and set them up in my basement. I searched through spare lumber the previous owners of the house left for us and found some great 1" by 12" planks. Large sheets of plywood were in the plan for my next project, so I knew I needed a large surface that I could use for a variety of scenarios.
Spacing the planks out parallel to one another with a 12" gap in between worked perfectly - basically just lining the side of the planks up with the sides of the horses. The end of the planks stick out about 24" over the saw horses. This extension, plus the inside gap, make it a sturdy and flexible area for cutting and laying out materials. It is especially handy for clamping material as there are so many open edges that are not very deep.
I pre-drilled pilot holes for some screws, then used a spade bit to deepen the hole a little bit so the screws would be sunk into the planks and not touch things set on the work surface. I screwed the planks down with some 2" screws and haven't changed it since.
It's sturdy enough to run my mitre saw and to also let my circular saw have its way with a clamped piece of plywood. It was cheap (free), easy (I hope you don't need plans for this one!) and it is holding up well. An all around satisfying project in itself!
| My Cost: | $0 - using hand-me-down horses, salvaged lumber and other tools already on hand |
|---|---|
| Supplies: | 2 saw horses, 1"x12" lumber, screws, drill, screwdriver, spade bit |

1 comment:
One tip to keep in mind - if you are going to use any mounted equipment such as a mitre saw (like in my photo) make sure you mount it over one of the saw horses. Otherwise, even some of the stiffest surface material will bow downward and potential affect your stability.
Post a Comment